 |
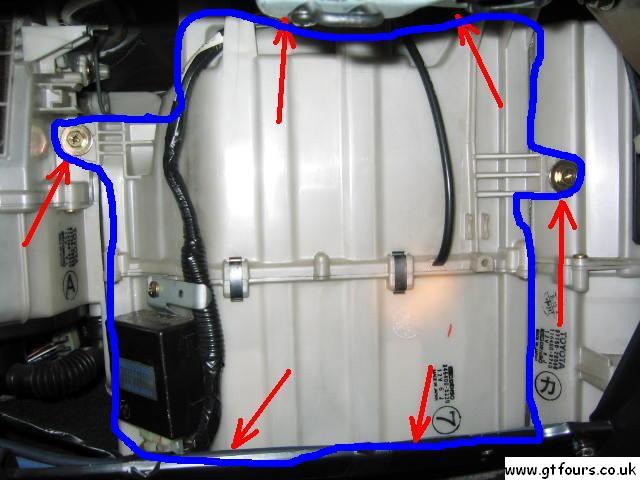
| Overall layout for the aircon system. Note that the pipe routing is reversed on UK cars |
Why do I want to remove my aircon?
In the UK you probably only really use it about 4 times in a year, it doesn't really get that hot! Besides, you've got a sunroof and windows! If you remove the aircon then you can benefit from the following:
Are there any tricky areas to watch out for?
Removing the system is pretty straight forward, just a case of ditching bits and pieces.
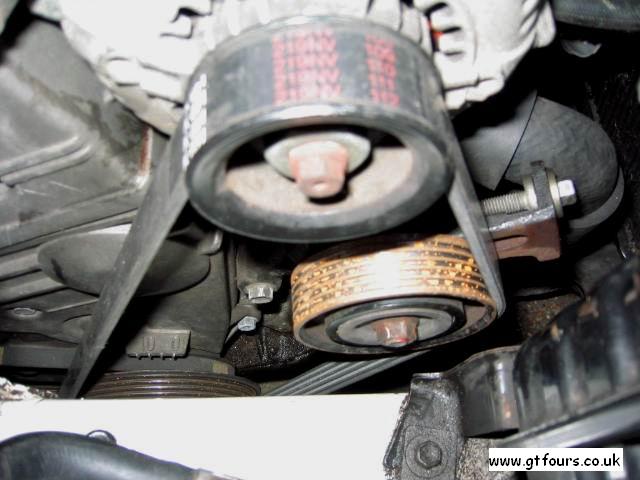
The only real problem is how to remove the pump, as the pulley that turns the pump shares the same belt as the alternator pulley. Therefore, if you remove the pump the pump pulley won't be there, and your belt will be too big. Also the tensioner pulley for this belt won't work i.e. it'll be round the wrong way...a solution for this is below.
Apart from the pump, the liquid/gas pipe connections may cause you a little grief as they will probably be corroded. You can hacksaw through these if you want, but I managed to get them all undone with a bit of swearing and large spanners.
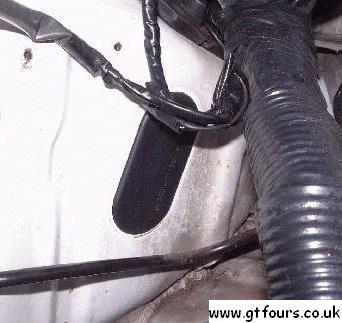
Be certain to leave one of the engine bay sensors located adjacent to the diagnostic socket attached to the aircon wiring loom, otherwise the radiator fan will run continuously - Picture. Everything else can be ditched, with no ECU error codes.
Which bits can I remove?
I suggest removing the aircon in this order...
|
| Overall layout for the aircon system. Note that the pipe routing is reversed on UK cars |
Removing the pipe work
Before removing the pipe work, ensure that the system is depressurised and correctly vented i.e. take it to your local aircon man who will reclaim the gas from your system, just so that you remain environmentally friendly!
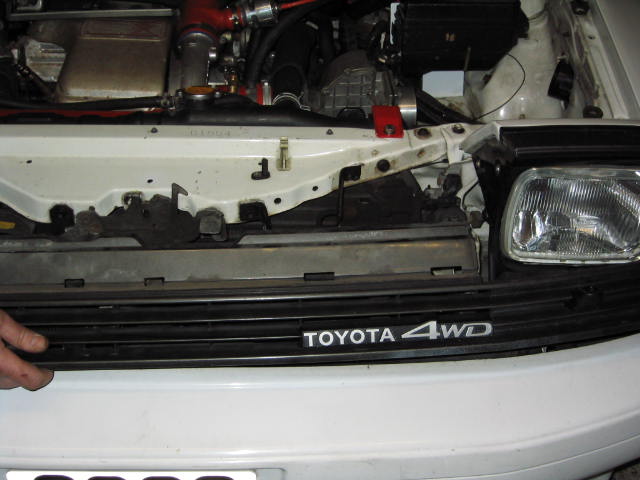 |
Remove the front plastic trim and grille. You'll need to unclip the headlight washer pipe work as well... |
Pipe work to remove (location as if you are standing at the front of the car):
|
|
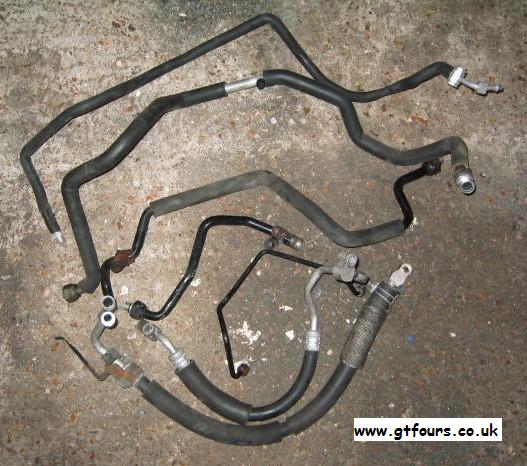 |
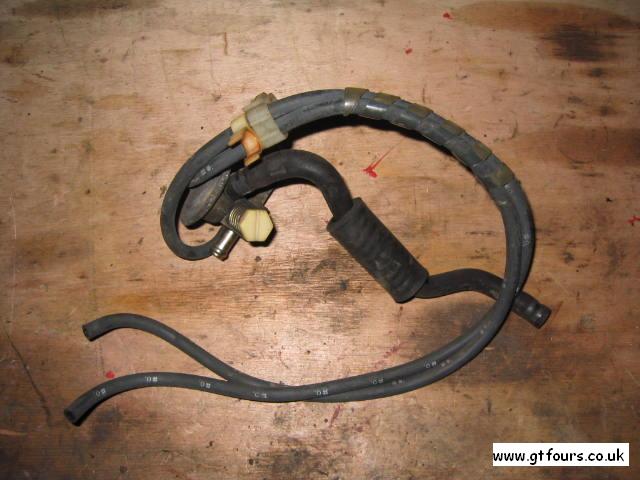
All the pipe work removed. The pipe work will be awkward/stiff to undo. Use decent spanners or cut the pipes with a hacksaw... |
Removing the Cabin Chiller unit
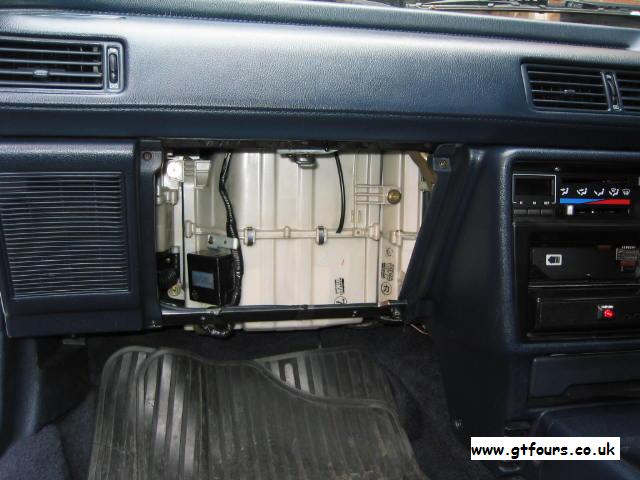 |
Remove glove box, 2 x screws holding it in at the bottom. This exposes the fan trunking as shown. The plastic surround unbolts and you can slide away the casing to reveal the chiller unit housed within |
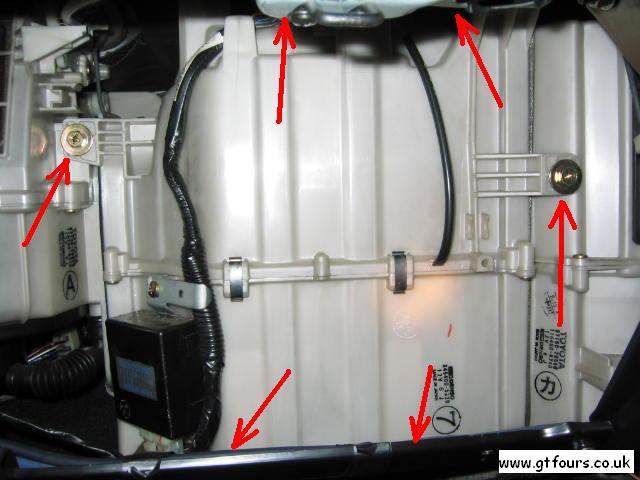 |
The chiller surround/ducting is bolted at 6 positions |
 |
After removing the 6 bolts and unclipping the wiring, the plastic unit can be withdrawn |
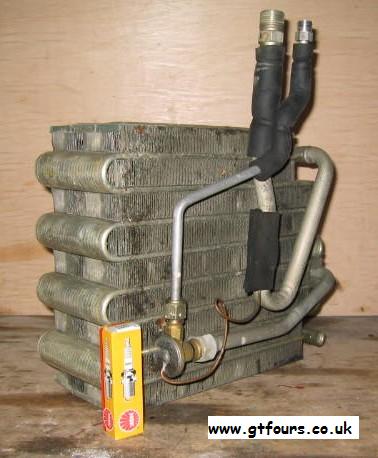 |
The chiller unit "simply" pulls free out from the plastic box. Note the sensor pushed into the cooling matrix. Remove this, but leave it attached to the wiring loom, tape it somewhere up out of the way within the original chiller surround |
| Refit the fan/heater ducting, (ensuring that temp sensor is still connected) and put the glove box back together | |
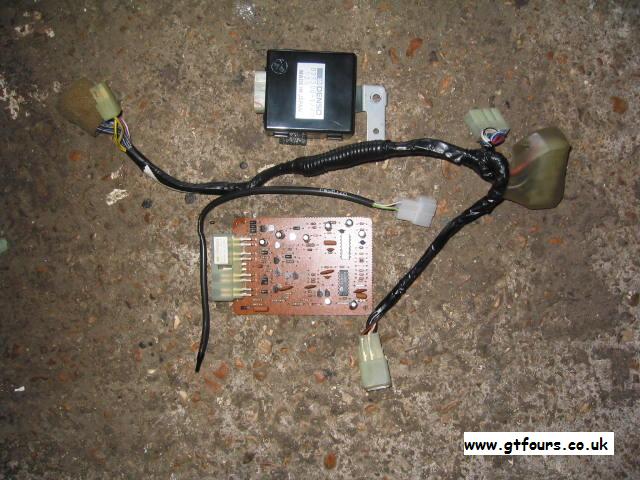 |
Underneath the white plastic housing is the AC amplifier and a couple of other bits, these can also be removed |
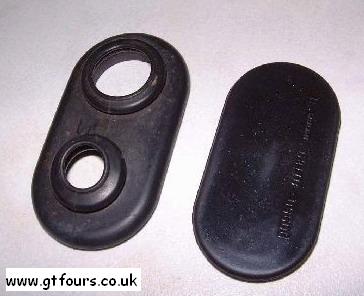 |
The entry point from the engine bay into the cabin for the aircon pipes passes through a grommet with 2 holes. To plug these holes either use blanking caps or you can purchase the correct blanking grommet from Toyota for ~£5, part No 90950-01189 |
 |
The fitted blanking plate |
Removing the cooling fan / liquid receiver / condenser / condenser mounting brackets
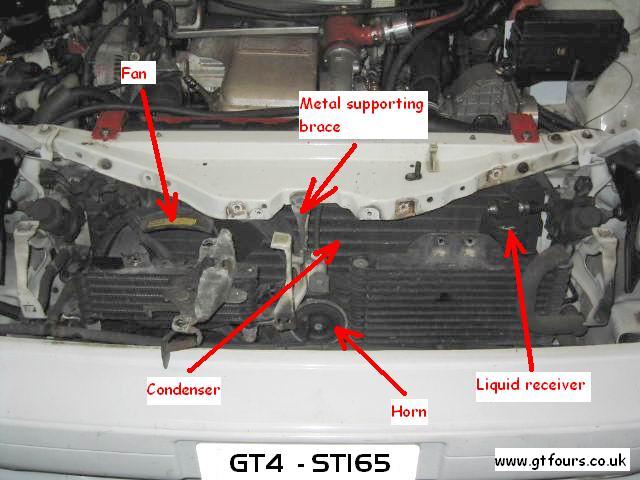 |
Unbolt and remove the bonnet catch, horns and supporting metal brace |
 |
Unbolt and remove the fan from the front of the condenser...it was awkward but it came out eventually |
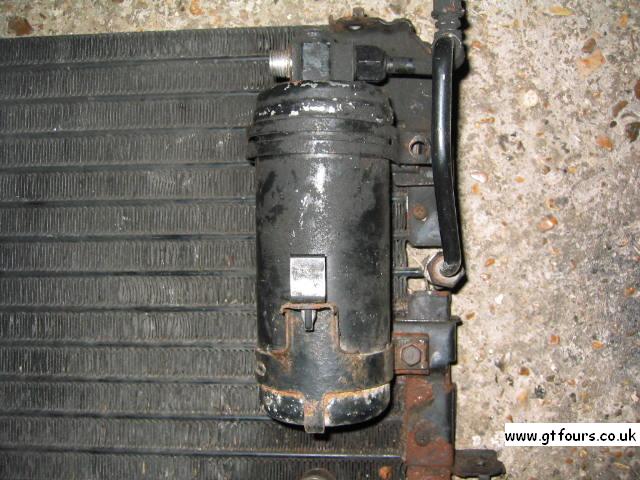 |
Unbolt and remove the liquid receiver from the condenser |
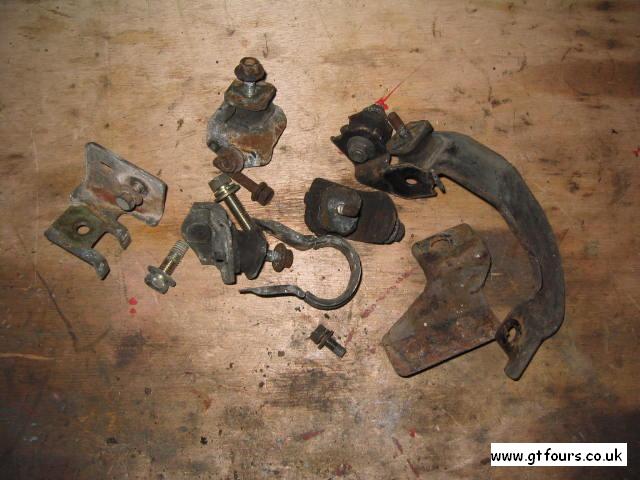 |
Unbolt and remove the mounting brackets etc... |
Bit tricky this one. The alternator drive belt feeds around the crank pulley, alternator, belt tensioner and then the aircon pump.
This article assumes you have contacted me about my pulley kit - for sale! (the kit has been tried and tested and will fit the 165 and 185)...
 |
To remove the pump, undo the electrical connections and then remove the 4 bolts as shown. This will also release the alternator belt tensioner pulley mounting bracket |
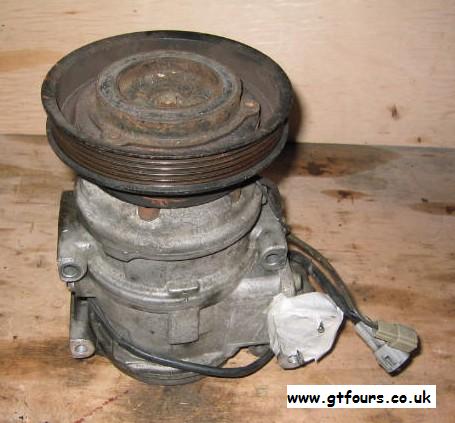 |
Pump removed from the car... |
 |
Assemble the new pulley onto the bracket, and using the 2 small bolts re-attach the bracket back onto the block as shown - 25 Nm |
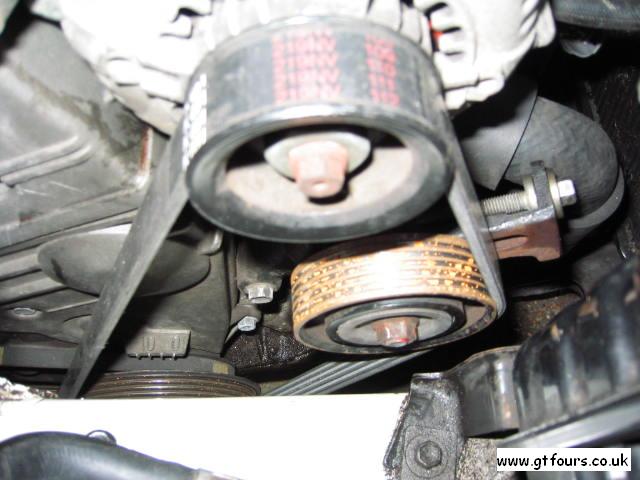 |
Fit the new replacement shorter belt |
| Adjust the tensioner until the belt it tight - ish. Important - do not over tighten the belt. This may cause premature bearing failure in the alternator and/or belt tensioner pulley as well as contributing to cracking the head! (the cracking issue only appears to be applicable to the 165) |
What does the kit consist of?
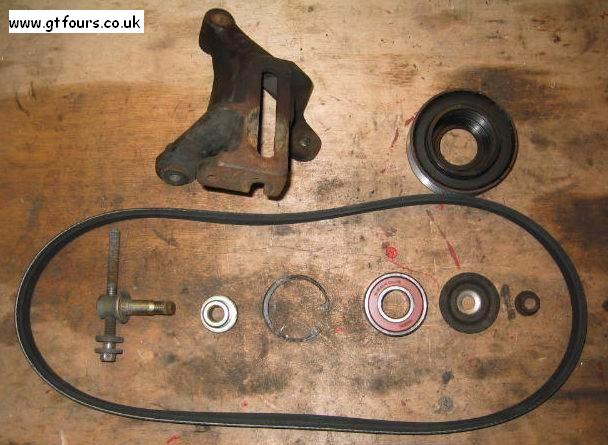
Machined pulley, new bearing and new correctly sized belt. Other benefits are:
 |
 |
|
| Original and replacement pulley | Side view of original and modified pulley | Side view of bearing housing |
 |
 |
 |
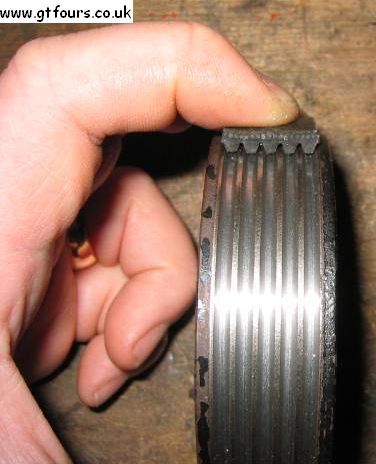
| Machined pulley matched to shorter ribbed belt | Complete belt tensioner assembly | Fitted kit - the pulley is a little rusty because the car hadn't been run for 2 weeks or so and the pulley got wet! |
Does the kit work?
In a nutshell - yes. Was on the car for approx 20,000 miles, numerous trips up to the redline with no problems. This kit has also been fitted to 185s with no problems.
Sounds like a good solution! What other methods are there of removing the pump?
I don't want the hassle/expense can you send me a kit?
Yep, e-mail me for more details
Removing the sensors
 |
Ditch the idle up valve |
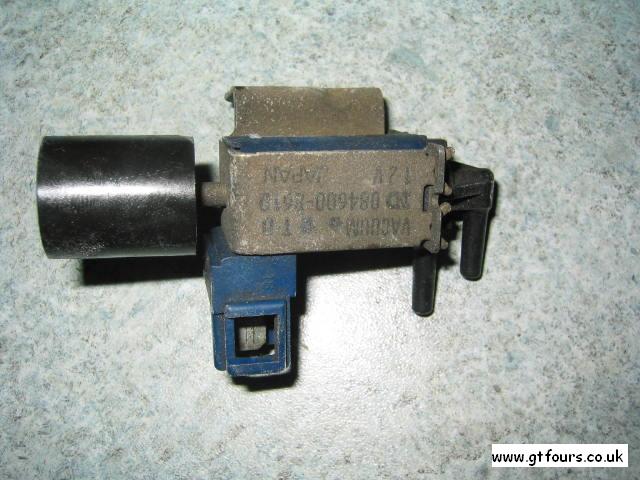 |
And the aircon VSV |
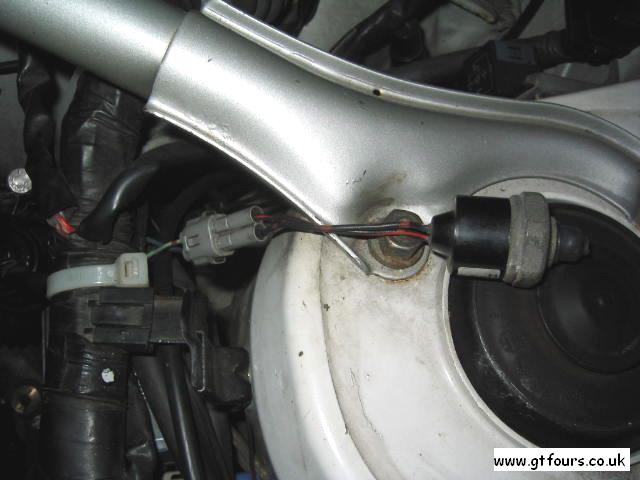 |
Remove only one of the sensors from the solid pipes next to the diagnostic socket, otherwise the engine radiator cooling fan will run continuously. The only sensor to remain is connected to the blue/black and light green/black wires. If you don't want to leave the sensor then you can simply short the two pins together... ** Update 02/05/06 *** For the 185 there are 4 wires to this sensor. The blue/black and green/black wires, (the outer 2 wires) should be shorted together to prevent the radiator fan from running continuously |
Any questions or comments then please feel free to e-mail me
Disclaimer