 |
 |
 |
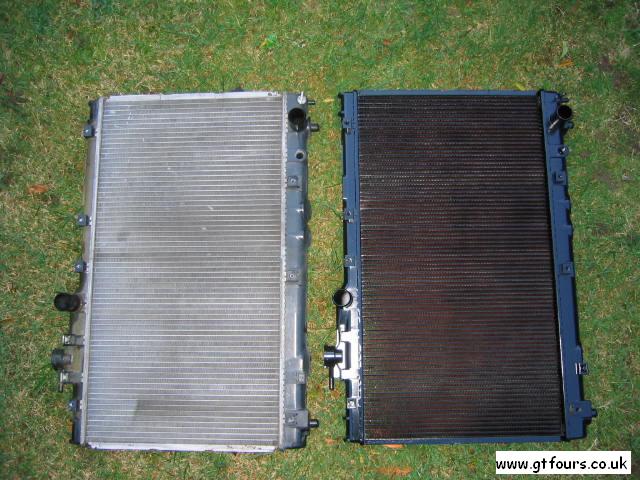 |
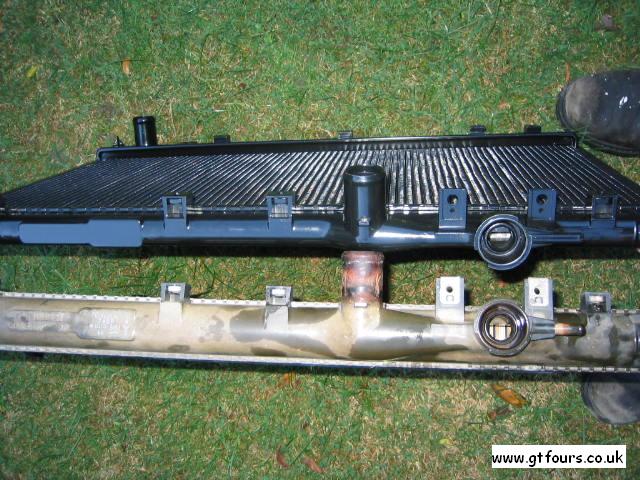
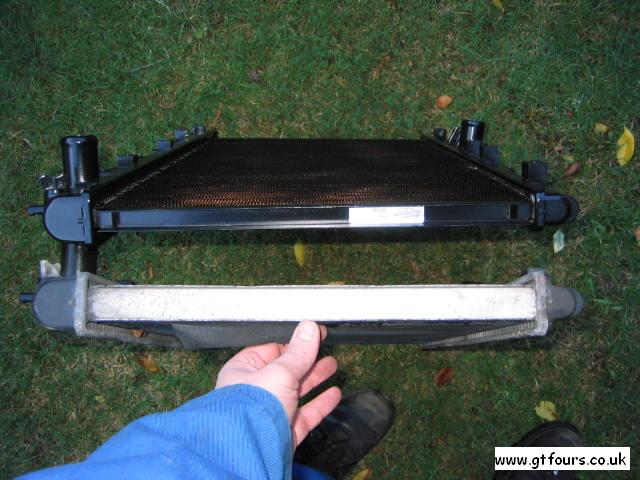
| Old and new radiators. The brown discolouration is plain to see... | Hairline cracks, time to change the radiator! | The Serck radiator is thinner than the stock radiator | Old and new rads, the colour contrast is quite obvious |
* This article has pictures from the 205, however the procedure is the same for the 165 and 185 *
Where can I get a replacement radiator from?
Toyota do an exchange radiator for both the 165 and 185 GT4s for ~Ł100. Insist they do one and eventually they will order one for you. In the meantime tell them it's "VOR" - Vehicle off Road and that should speed up the delivery time.
It's not so simple for the 205. Toyota at present, (07/12/03), do not do an exchange radiator.
Serck Intertruck manufacture a replacement radiator which can be picked up for ~Ł120, part number SER2619607. This is the incorrect radiator as it is only a single core. All the GT4s run double core radiators.
Toyota Celica Breakers, (01579) 383879, can also source brand new radiators.
A new radiator from Toyota is ~Ł300!
How do I know when it's time to change my radiator?
Normally it'll leak around the top plastic tank, or worse still it will crack and water will bead up around these hairline cracks. Your temperature gauge may well zoom up to into the red as well. If the engine overheats it could be VERY bad and VERY expensive.
After undergoing several years abuse and lots of heat cycles the top plastic radiator tank tends to change colour to a light brown. Inspect this closely and you will probably find hairline cracks running across the radiator, I know someone who saw this and touched it with his finger only to start a water leak and the hunt for a new radiator! I would suggest thinking about finding a radiator soon-ish or a breakdown might unexpectedly pop up!
|
|
|
|
| Old and new radiators. The brown discolouration is plain to see... | Hairline cracks, time to change the radiator! | The Serck radiator is thinner than the stock radiator | Old and new rads, the colour contrast is quite obvious |
Before I start what bits/tools do I need?
How did you change the radiator?
Covered here as well is how to change the thermostat, which to be honest for the expense ~Ł15 it's well worth doing at the same time.
 |
Do this job when the car is cold, or you might burn yourself! Remove 2 top securing brackets at the top of the radiator, unplug lhs and rhs fans. Undo the 2 fuse holder securing bolts and push the fuse box out of the way. Undo and remove the alternator snorkel |
| On the lhs fan, undo the 2 easy to get to 10mm head bolts and the 1 x 10mm head bolt at the bottom centre of the fan and pull this up and out of the way | |
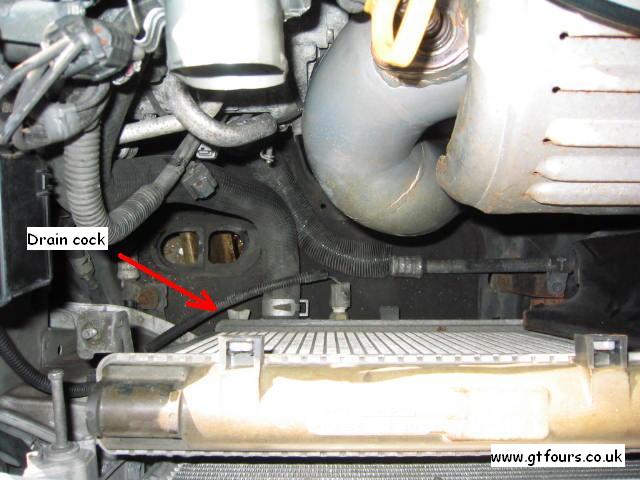 |
Now we have a bit of access, look down and you will see a drain for the cooling system. Open this valve almost all the way out to drain the system, don't forget to remove the radiator cap to let the coolant flow out easily |
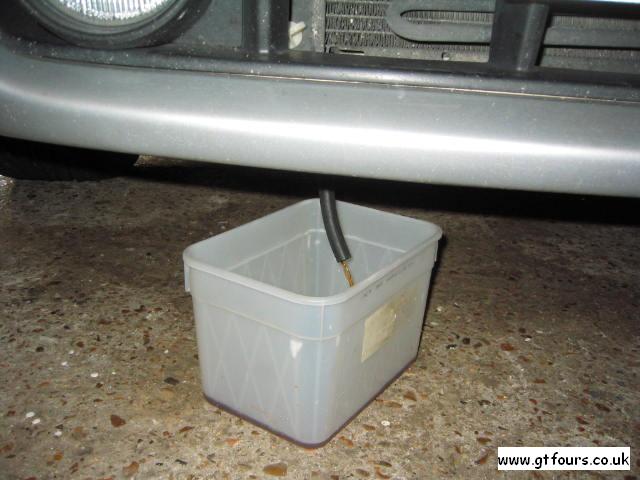 |
A 10mm pipe will be a loose fit onto the drain, and the old coolant can be drained into an old container without soaking yourself and everything else nearby |
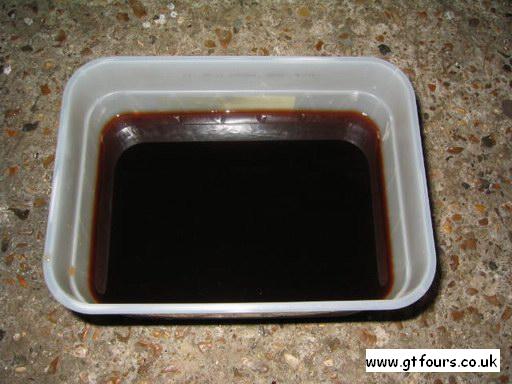 |
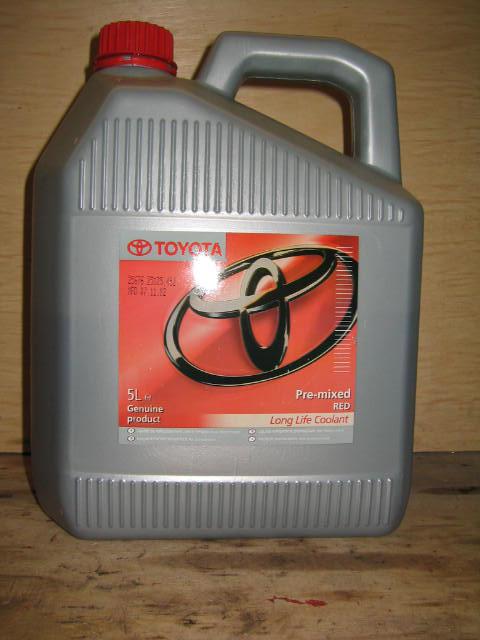
The coolant should be periodically changed - every 2 years to maintain it's anti corrosive and other qualities...This coolant is not the right colour, it should be bright red and a lot clearer |
| Undo the bottom hose and the top 2 hoses, the radiator can then simply lifted out from the car! Note the rhs fan remains attached, you may have to move the battery very slightly to squeeze it out | |
 |
At this point it may well be worth changing the thermostat...Blueprint do an inexpensive 82oC thermostat that comes with the necessary gasket |
 |
To get at the thermostat, look under the alternator at a weird aluminium pipe "thing" |
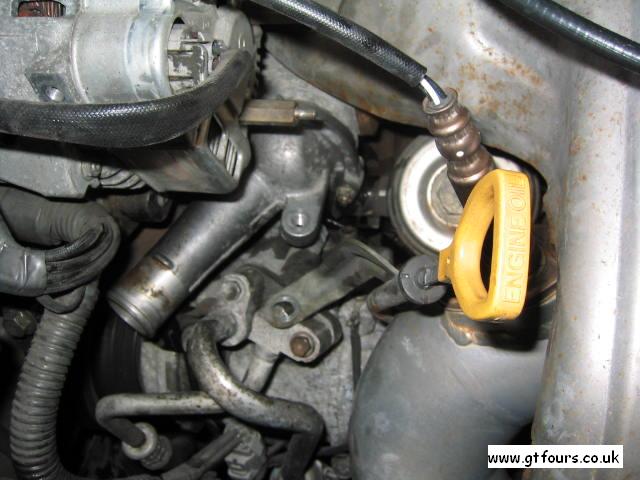 |
To remove this, remove the dipstick securing bolt and twist the dipstick out of the way. Then undo the alternator heat shield - 1 x bolt, 2 x nuts. Then simply remove the 2 x 10mm head nuts from either side of the thermostat housing and remove the whole pipe, complete with thermostat |
 |
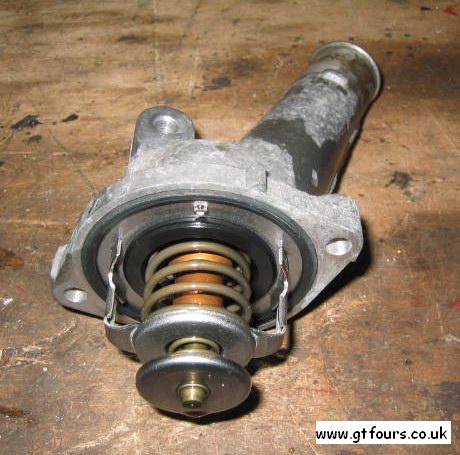
Your replacement thermostat should NOT look like my old one, in so much that the jiggle valve is incorrectly aligned. Note that the jiggle valve should align with the nipple on the thermostat housing as indicated |
 |
Replace the thermostat and fit a new seal, refit into the head, torque the securing 2 nuts evenly to 9Nm |
| Next up is to simply replace the radiator, but first unscrew and remove the radiator temperature sensor located in the bottom of the radiator, screw this into the new radiator, then remove the rhs fan and replace onto your new radiator | |
| Install the radiator and attach the 3 hoses. Top up the radiator so it's full, leave the cap off. Start the car and watch the level drop, keep topping it up until it settles, replace the cap and top up the overflow tank, watch for any leaks | |
| Feel the radiator hoses, initially the top one should get hotter, the lower one stay cool. Once the car is up to temp, the thermostat will open and the lower hose will suddenly get hot, soon after this the rad fans should cut in. Turn the car off and let it cool and then check that the level is okay - job done! |