 |
| 205 torque specifications |
Things you should know before
Torque specifications
All stated in Nm
|
| 205 torque specifications |
Tools
How to...
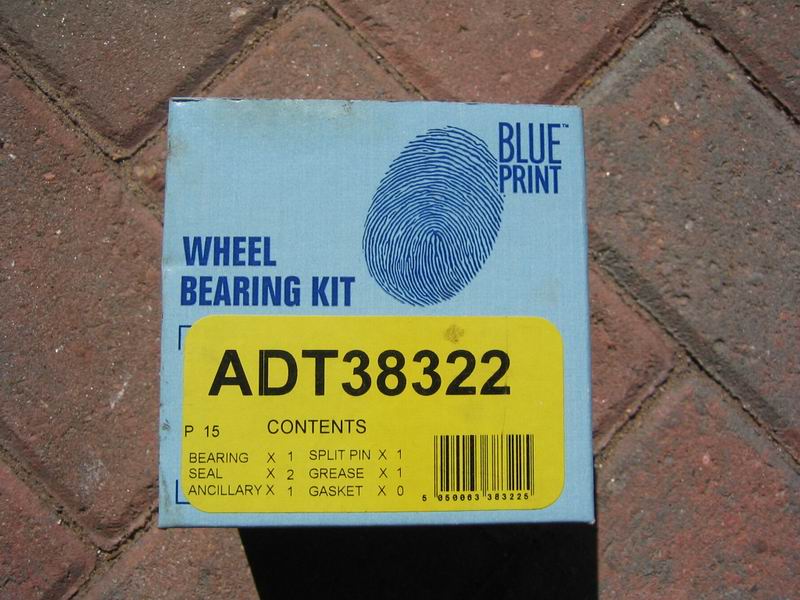 |
I found the best parts source to be Blueprint, part
number as shown. Obtained from a local motor factors. Included in the kit is the wheel bearing, 2 x seals, circlip, split pin and grease i.e. everything!
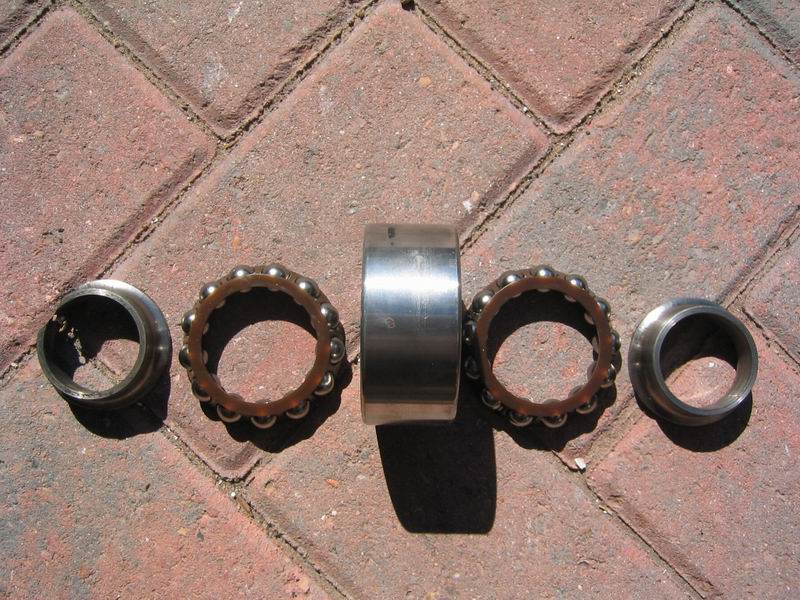
Bearing - DAC3874W-6 |
|
The original bearing is an NSK 388WD01A1a The original and replacement bearings are both of the open cage design, and once split apart the bearing looks something like this |
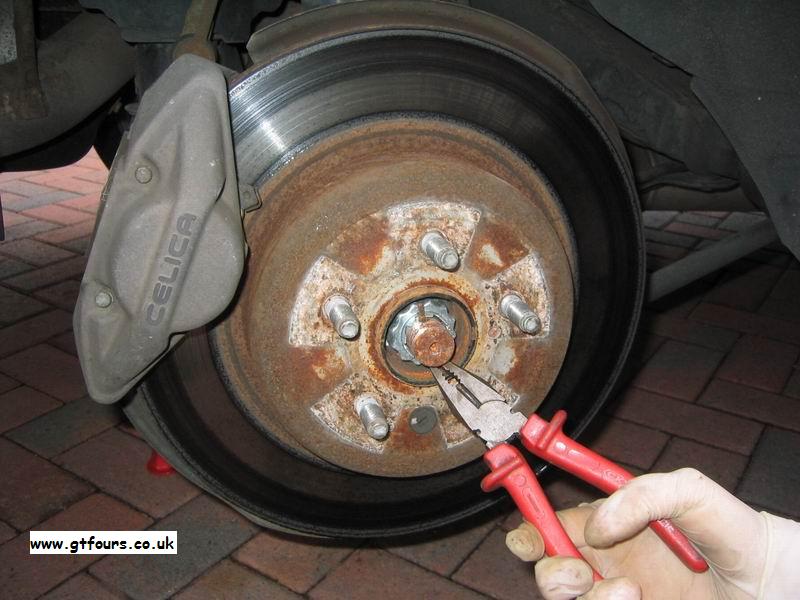 |
Remove the split pin from the driveshaft, and undo the hub nut (30mm socket required), undo the nut but leave this in place |
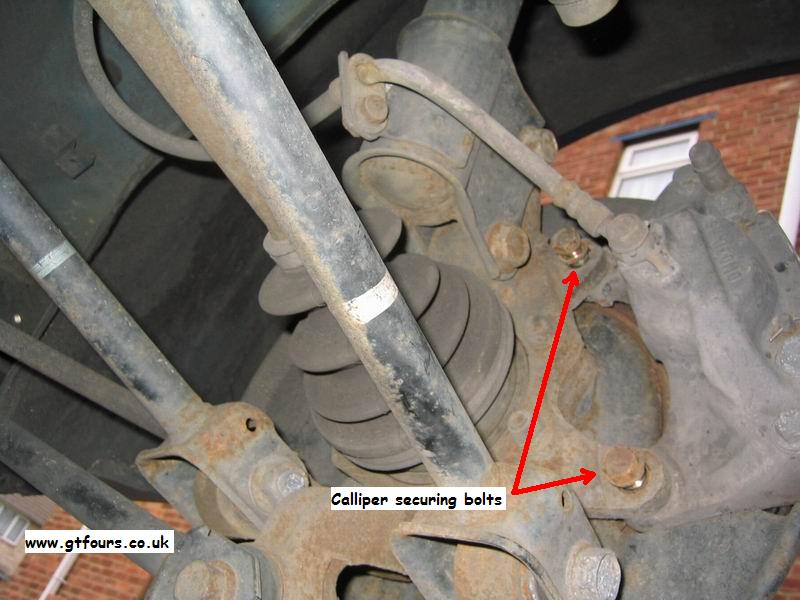 |
Undo and remove the 2 securing bolts at the rear of the hub, and pull the calliper off the disk and tie this up and out of the way |
 |
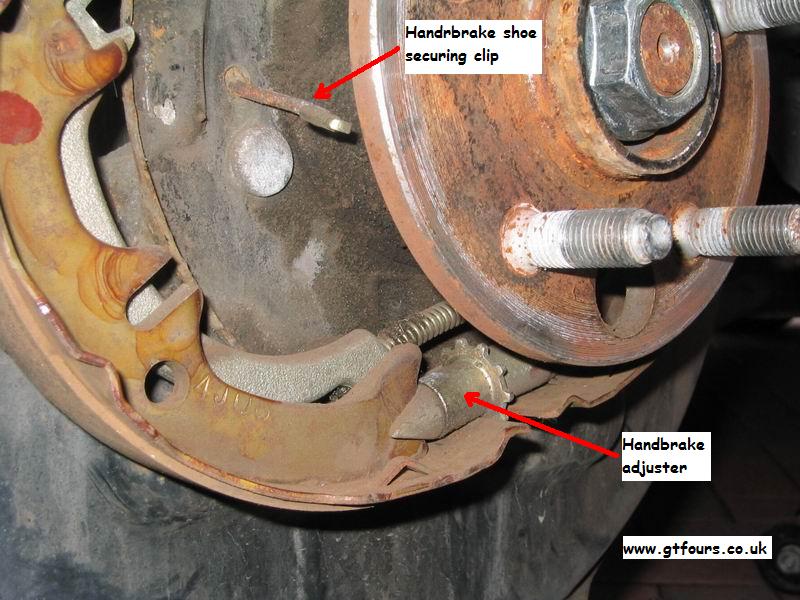
Take the handbrake off. Remove the dust cover to gain access to the handbrake adjuster. Wind the adjuster with the aid of a thin screwdriver to move the handbrake shoes away from the disk |
 |
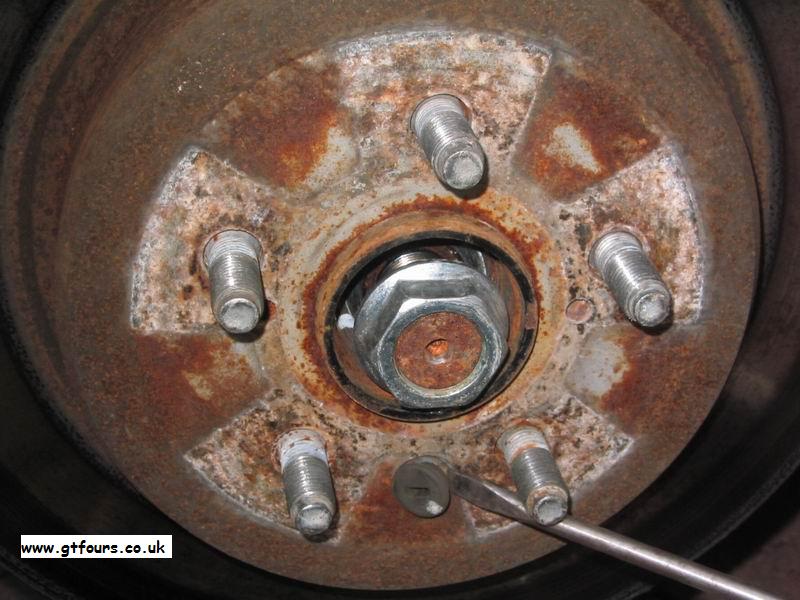
I found the disk to be stuck solid, so using a couple of bolts, (M8 x 1.25), wind these into the dedicated jacking off points and remove the disk from the hub |
 |
With the disk off the next job is to remove the handbrake cable in order to get the hub off. Remove the 2 springs at the top of the hub... |
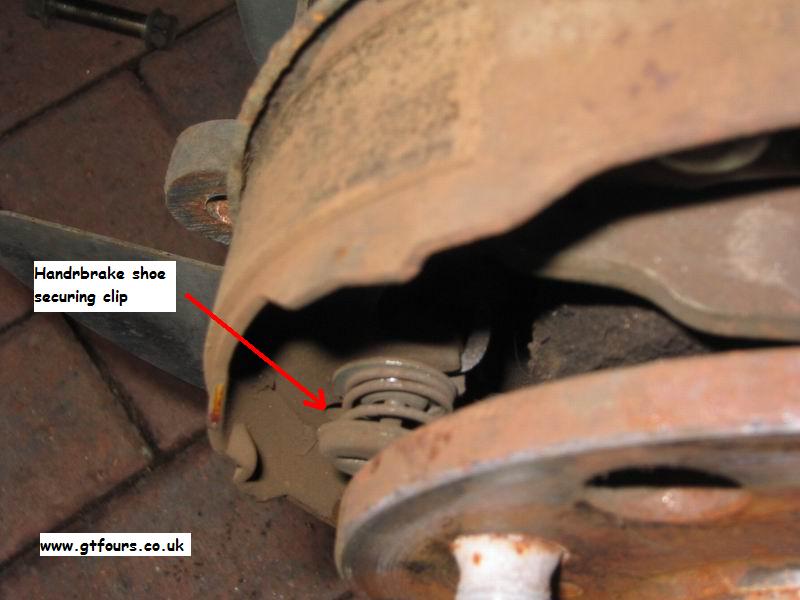
|
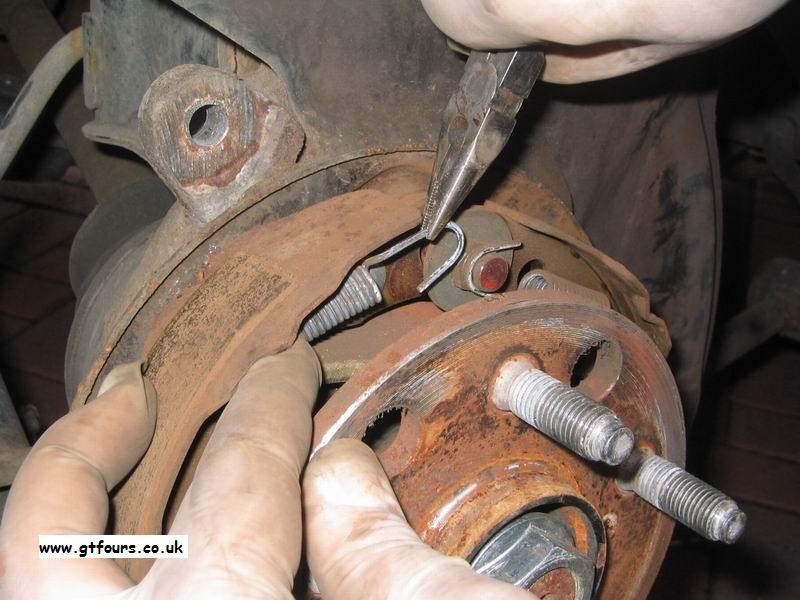
...and then remove the 2 hand brake shoe retaining clips... |
 |
...the shoes will fall away, only secured by the handbrake cable... |
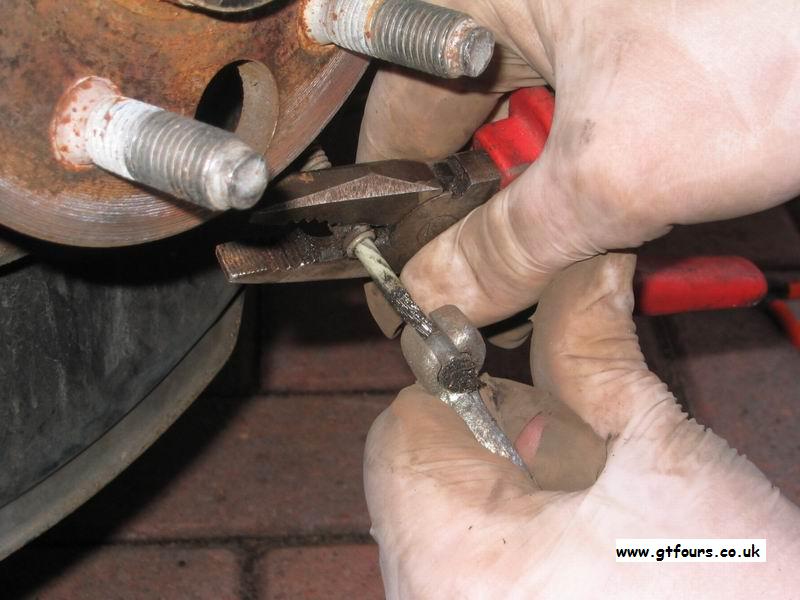 |
...I found by pushing back the spring and lightly clamping with a pair of pliers the shoe can be slid off the handbrake cable. Undo the 2 x 10mm head retaining bolts and feed the cable out the back of the hub |
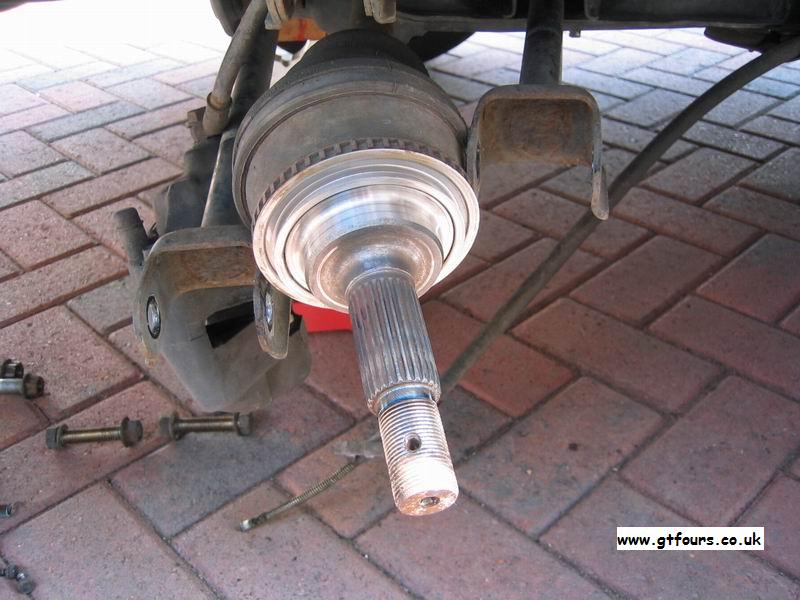 |
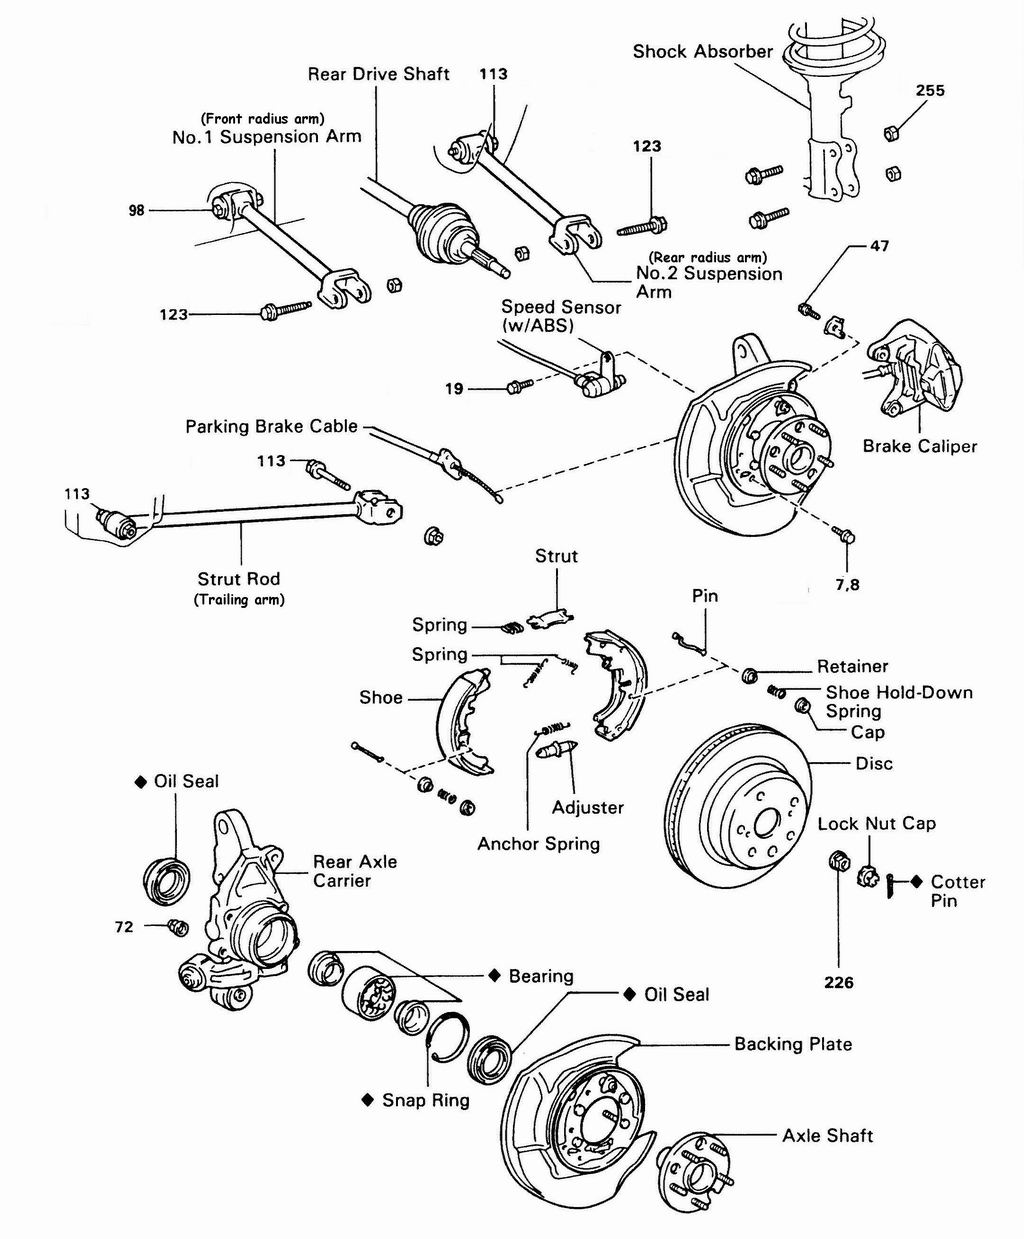
Undo the 2 suspension leg securing bolts and tap the driveshaft through the hub
with a mallet. With all the bolts undone the hub and "simply" be
pulled free. If the driveshaft is stubborn and refuses to come out easily from the hub, refit the hub nut a few turns to protect the driveshaft thread and apply more encouragement! |
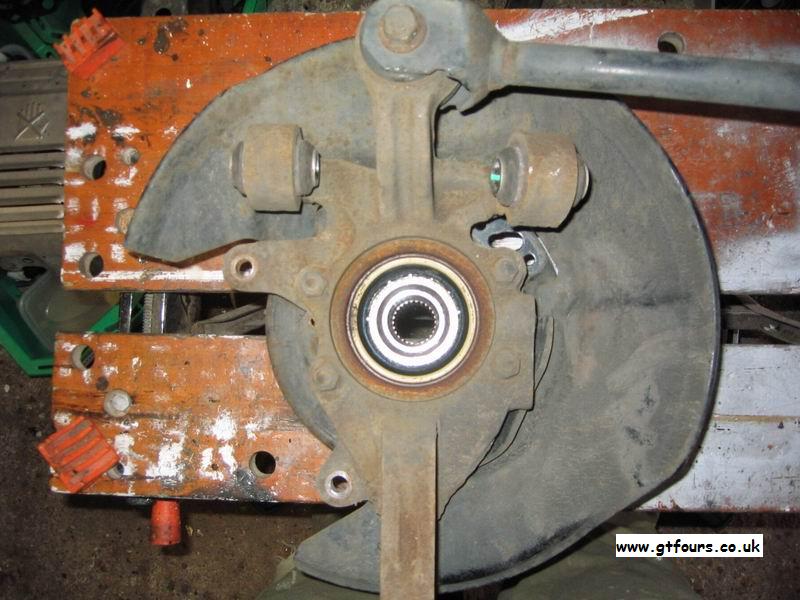 |
The hub |
 |
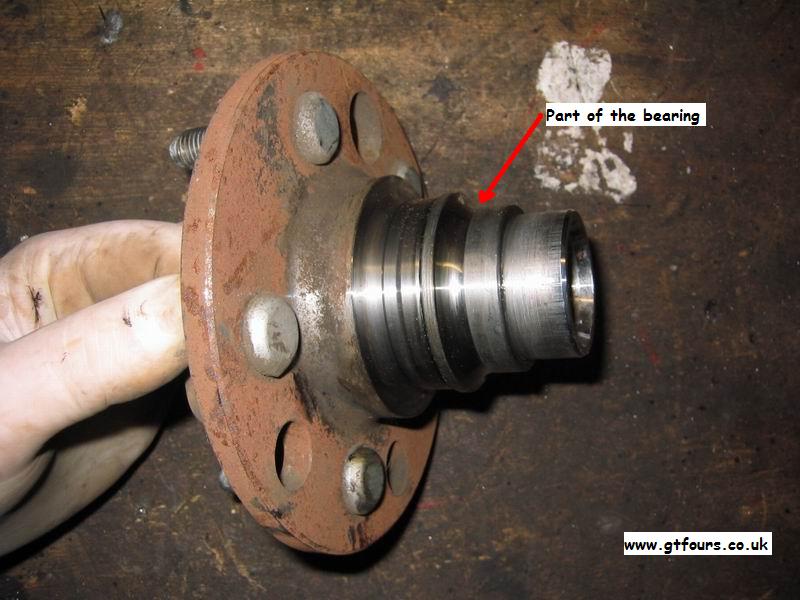
The stub shaft can be hammered through with the aid of a socket... |
|
...the stub shaft comes away but part of the bearing remains on the shaft. There is a special tool available from Toyota as this is a git to remove, but... |
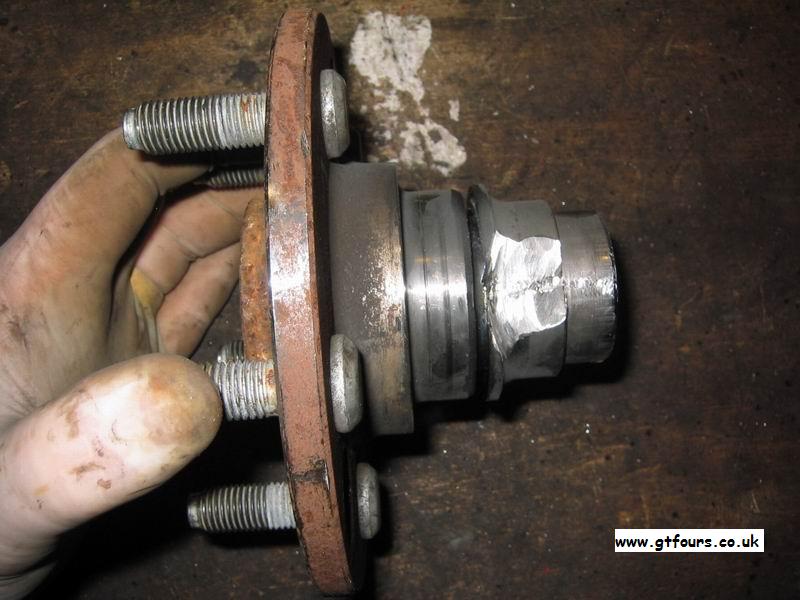 |
...I chose to slowly grind through so that I could remove this. You will find that access is awkward and there is not enough room to attach a bearing puller to remove it. Take care not to damage the sealing surface that lies between the end of the part of the bearing and the hub |
|
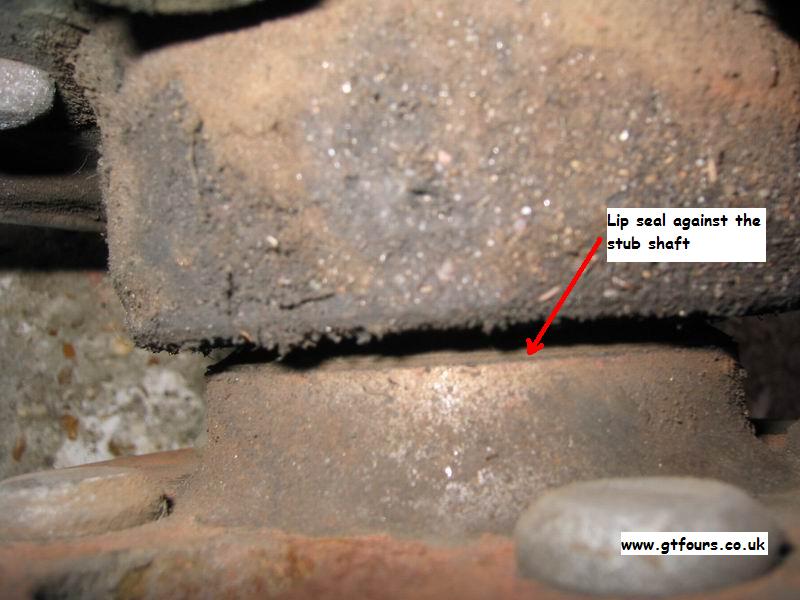
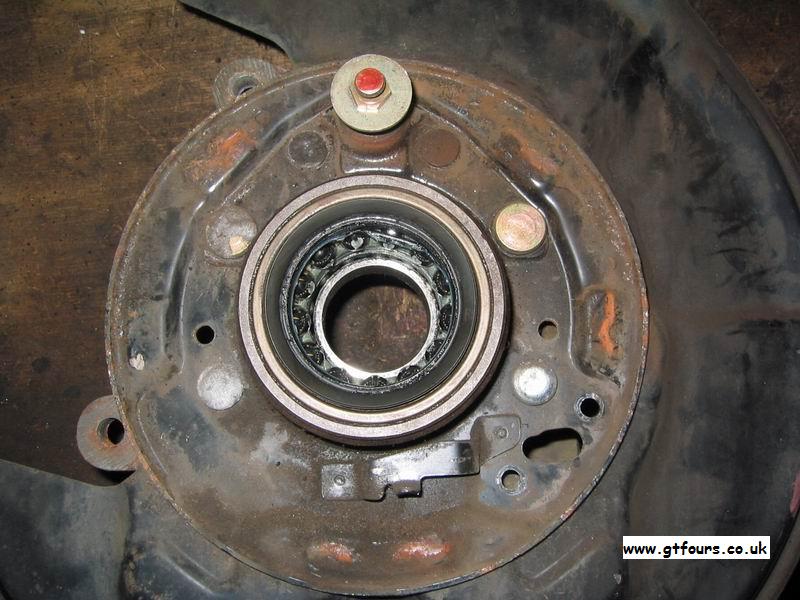
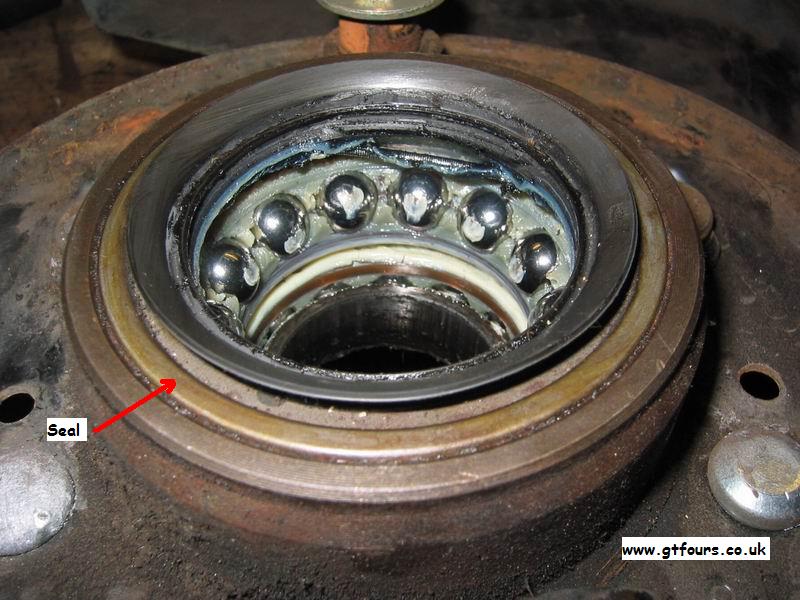
Lever out the 2 seals and remove the circlip. Note that the seals are fitted flush to the surface of the hub. Failure to fit the seals correctly will lead to crap getting into the bearing and then having to do the job again... |
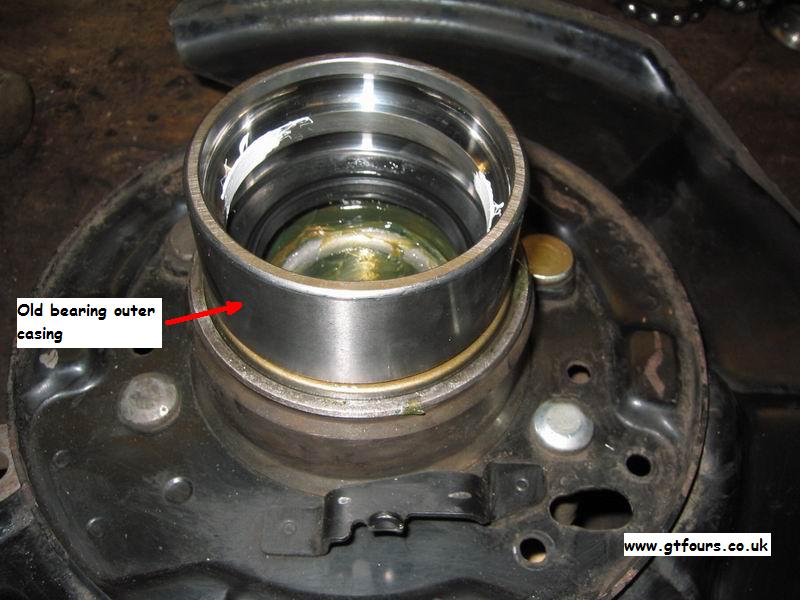
| The bearing can now be pressed out of the hub | |
| Clean everything up and ensure no crap can fall into your lovely new shiny bearing. To stop any crap falling into the new bearing and to halt the rust (for a while) I painted the whole hub with an anti-rust treatment | |
 |
I disassembled the new bearing and pressed the outer casing in with the outer casing from the old bearing - an exact fit |
| Fit the circlip, inner race, outer race and outer seal, pack with grease, note that there are 2 sizes of seal. Install the one that fits snugly onto the axle shaft - i.e. the smaller one. The seal can be tapped into the hub with the aid of the old outer bearing casing. Note, this should finish flush or just proud of the hub in order to seal correctly against the shaft shaft facing. | |
| Next, press in the stub shaft, and then fit the inner race and bearing shell over the stub shaft | |
| Finally fit the inner seal pack with grease and refit to the car! |
Any questions or comments then please feel free to e-mail me
Other jobs to do at the same time?
Safety