 |
 |
| 165 torque specifications | 185 torque specifications |
Why do this modification?
Replacing the trailing arm bushes will help the feel of the car and help to improve handling. The radius arm bushes won't help, unless they are badly worn. I would only replace the radius arm bushes if the stock spherical bushes had failed.
Things you should know before...
Yes, pretty much...They all share the same setup regarding radius arms, bushes and trailing arms. The 165 and 185 have the same rear shock.
Torque specifications
All torques are in Nm
|
|
| 165 torque specifications | 185 torque specifications |
Why do this modification?
Can't I just buy a new bush?
Toyota will say "stock bushes are ONLY available with a new hub ~£150 + vat", rubbish! If you really wanted to go to all this trouble and replace a worn bush with a stock item, then a bush from a Supra is an exact match part no - T42210-14010 - £24.82 + vat.
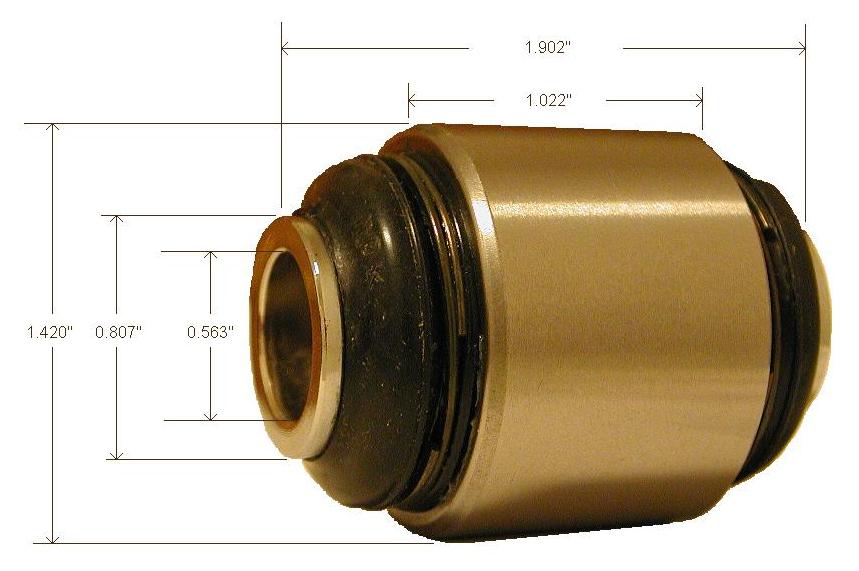 |
| Rear radius arm hub bush Part number T42210-14010 Thanks to Scott Campbell for the picture |
Tools
How did you replace the bushes?
Like this...
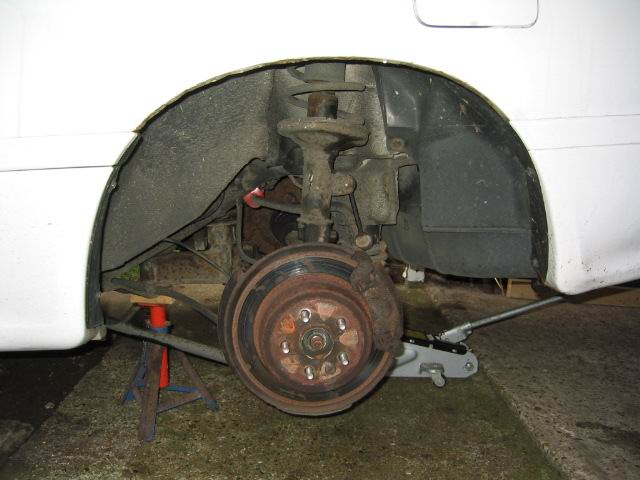 |
Jack up car. Remove rear wheel, not forgetting to chock front wheels, place axle stands under the car and release handbrake - be careful |
 |
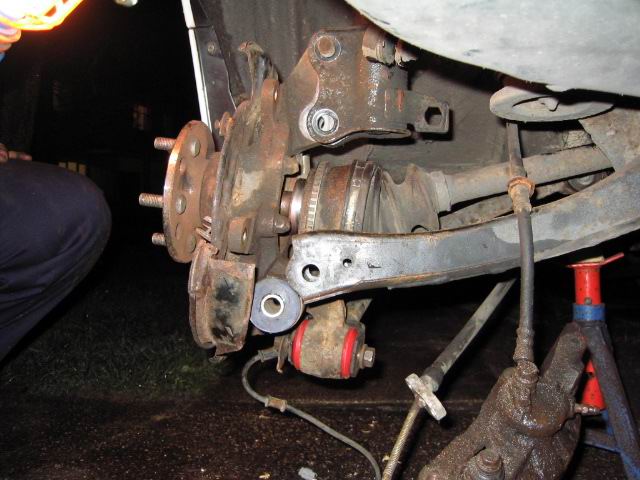
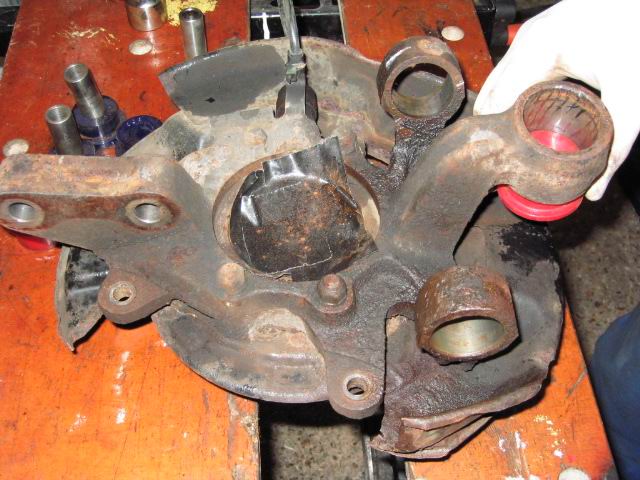
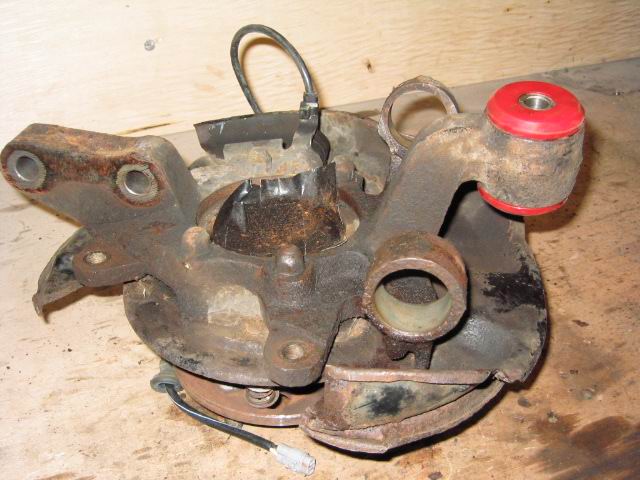
View looking at back of hub. Notice there are 3 bushes to be replaced. It is a good idea to spray the nuts with penetrating oil and leave to soak |
| Remove split pin, locking cap and undo hub nut. Note this will be tight and will require someone to stand on the brakes so that you can undo the nut | |
 |
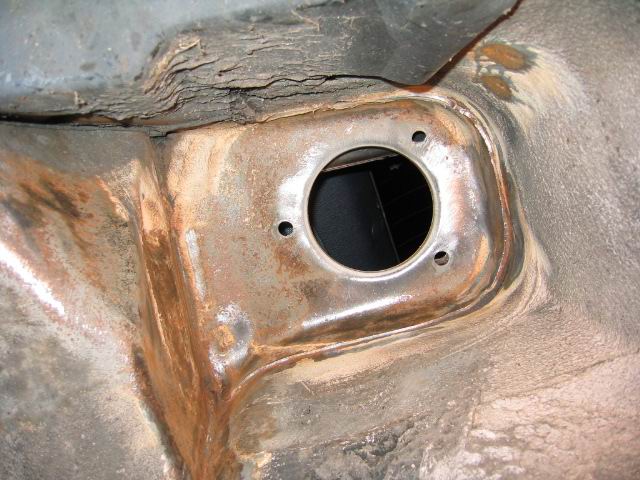
To remove the hub it is best to disconnect the ABS sensor from within the car, rather than try to remove it from the hub. Trust me I've removed them! Remove the rear seat by releasing the two catches on the front edge of the seat. Under the rear seat there is a small white plastic connector...undo it |
 |
Located on the front of the wheel arch is the mounting for the ABS sensor wiring. The bolts were seized and rusty. Best way to remove the cable is to lever up the clamps. Next pull out the rubber grommet and pull through the sensor wiring |
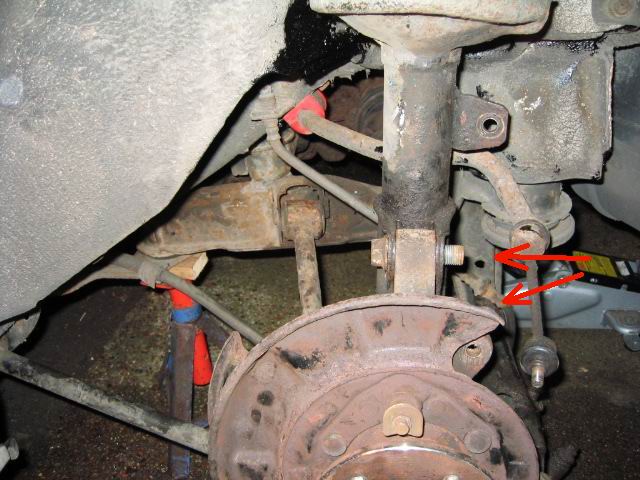
| Undo the trailing arm (strut rod) - secured between hub and in front of wheel arch Undo the front radius arm (No 1 suspension arm) - note this sets the toe in and out for the rear wheel. I didn't bother marking this up, seeing as though bushes etc will be replaced and will end up misaligned anyhow. This is awkward to remove and later replace. Some persuasion with screwdrivers / wrecking bars used as levers will help as this is recessed into the rear sub frame. Note that the fixing to the sub frame can only be undone BOLT end Undo rear radius arm (No 2 suspension arm) - straightforward It is preferable to remove the arms at the hub but in practice I found this difficult and undid the most accessible nut/bolt * Note that the nuts securing the arms have a metal "wing" so that you can "simply" undo them from the bolt side. In practice these were ball bouncingly difficult to remove, a breaker bar and a length of scaffolding pole will be required to shift them. Note the metal "wing" simply bent under the pressure Remove the brake calliper - undo 2 bolts at rear of disk and tuck the calliper out of the way |
|
 |
To remove the rear disk, remove the rubber grommet from the disk in order to access the handbrake adjuster. Align the hole with the adjuster, (need a torch), and turn the adjuster to withdraw the shoes from the disk. The disk can then easily be pulled free. Note the hub nut, nut retainer and split pin should already have been removed by this stage (photo taken during a later brake adjustment) |
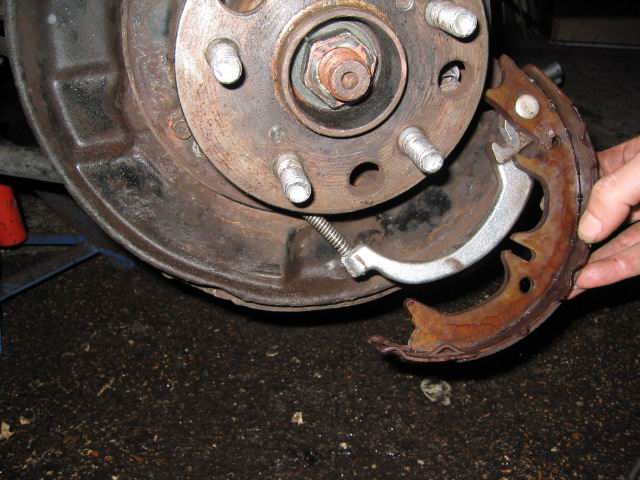 |
Remove handbrake brake shoes, and detach handbrake cable from shoe |
 |
Remove 2 bolts securing the handbrake cable and push cable out through the back of the hub |
 |
Undo the 2 suspension leg bolts. Take care that the bottom of the suspension leg does not hit or damage the CV boot - there's not much room. Do not push the bolts out from the suspension leg/hub with your finger, you might loose your finger! |
 |
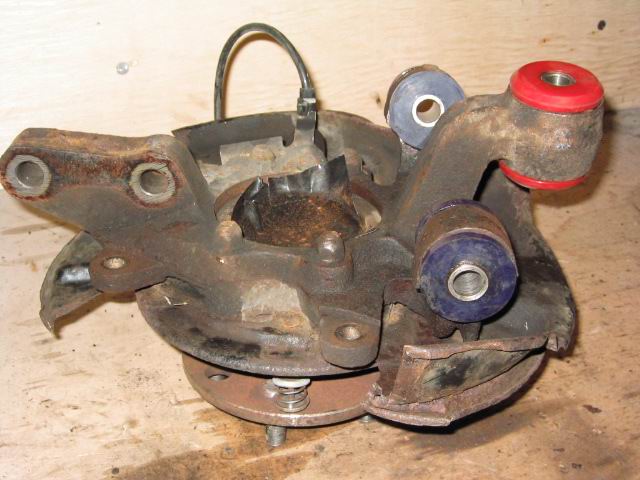
Hub being separated from arms and legs, (note this picture shows the bushes already replaced) |
| Next, simply pull hub free! (in true Haynes manual style!) Watch out for the CV boot, and don't pull the drive shaft out from the diff too far otherwise you'll be in for another job...You may need to separate the driveshaft from the hub, (it might be stuck), if so refit the hub nut and hit the end of the driveshaft with a rubber mallet. Use the nut and you won't damage the thread | |
 |
Hub finally removed from car. Note that the wheel bearing has been covered over with tape. The bearing is an open cage type and as such is prone to attracting all sorts of crap including metal which will prematurely fail the bearing. Before covering up inspect the bearing/grease for debris and remove otherwise you will be doing all this again - oh so very shortly! Click here for an article on how to replace a rear wheel bearing |
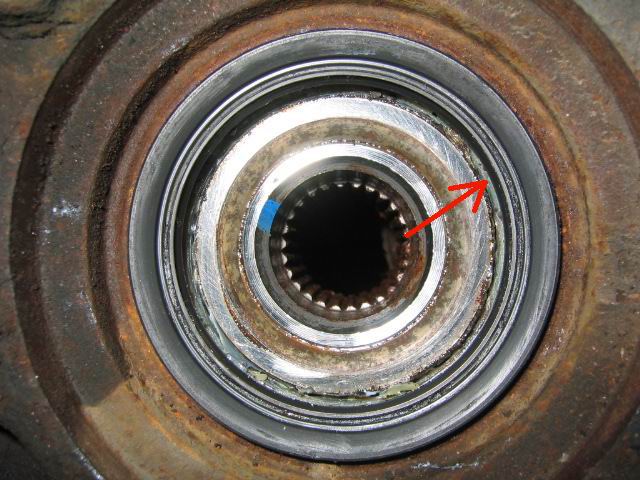 |
Picture of the wheel bearing just waiting to catch all the crap! Crap attracting area indicated... |
 |
First to be removed is the lower bush, not that it matters in which order they are removed. I found the best way to remove was to drill through the rubber to provide a little room for the rubber to flex. Then remove the top rubber lip with a sharp Stanley knife... |
 |
...and using a screwdriver inserted through the bush, hammer this through and out of the other side of the hub... |
 |
...to remove the rubber bush |
 |
Next up are the two hardest to remove. Soak these in penetrating spray. They look part of the hub to
start with, but they will come out with some "gentle" persuasion First smash through the centre portion of the bush. This has a plastic mounting and is surprisingly difficult to break, but it will eventually come - hit it hard! Apply heat to the outside of the hub and freezing spray to the inner side and hit the bush with a suitably sized socket. The bush will very slowly begin to move |
 |
A correctly sized socket acts as a drift and eases the bush down and out of the hub. The hammer method I found to be the only way as I could not get a suitable position in order to press out these bushes - the hub is an awkward shape! |
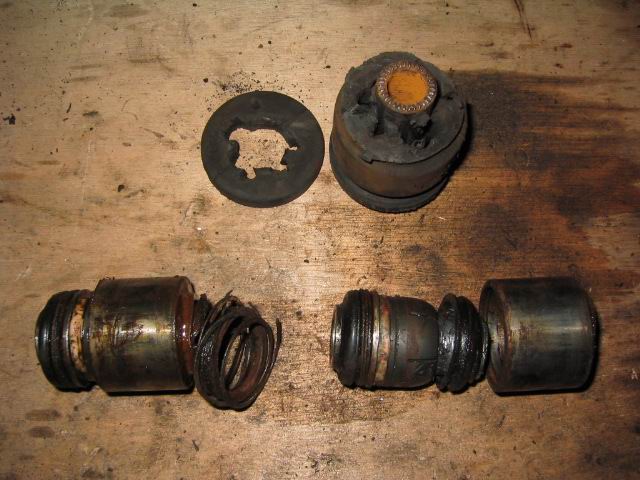 |
The three removed bushes, note the lower 2 spherical bushes and the solid rubber bush |
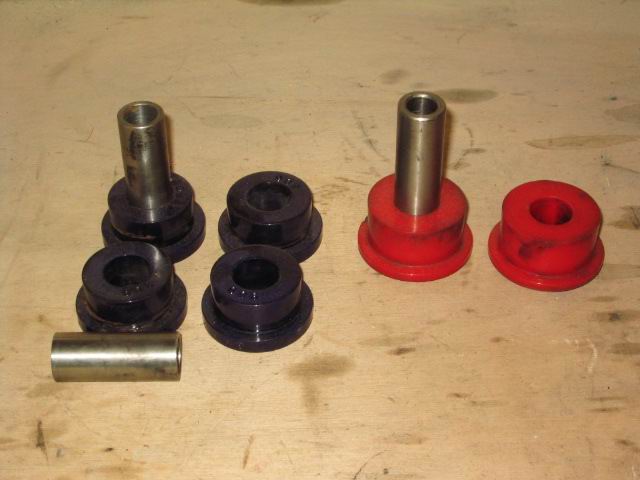 |
The three new bushes. A lot easier to fit than standard bushes! |
 |
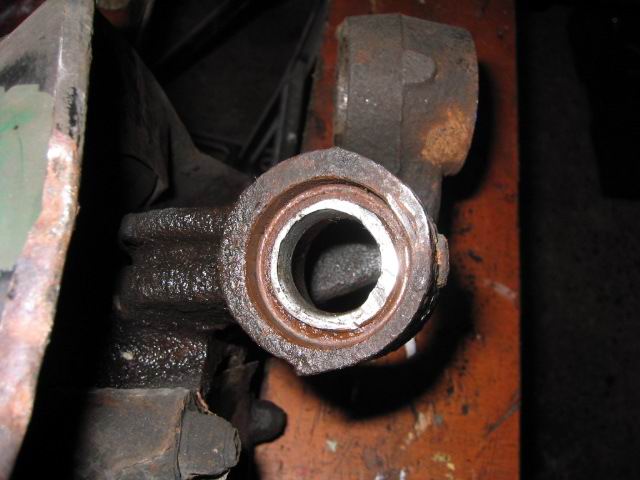
One naked hub ready to be fitted with PU bushes. First insert one half... |
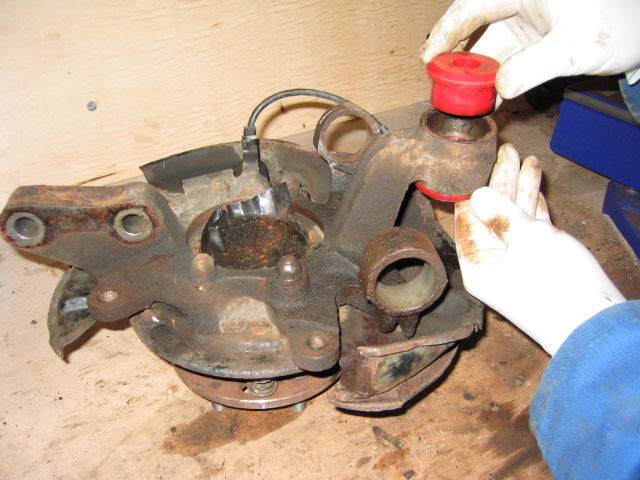 |
Then the other... |
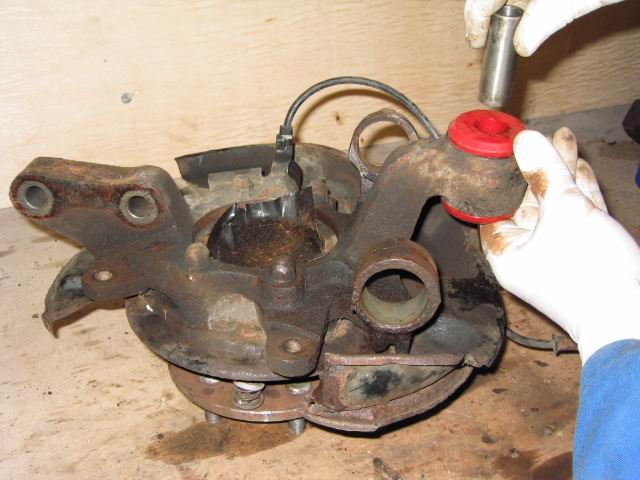 |
And then the centre shaft |
 |
The whole bush should be aligned centrally about the hub and the centre dowel lightly greased to avoid squeaks |
 |
The finished hub |
| Refitting is simply a reversal of removal! Good luck... | |
| Tips |
|
Any questions or comments then please feel free to e-mail me
Other jobs to do at the same time?
Safety